
As an Amazon Associate I earn from qualifying purchases.
On the JJ Barnes Blog, this step by step nail art guide will teach you how to create stunning cherry nails at home!


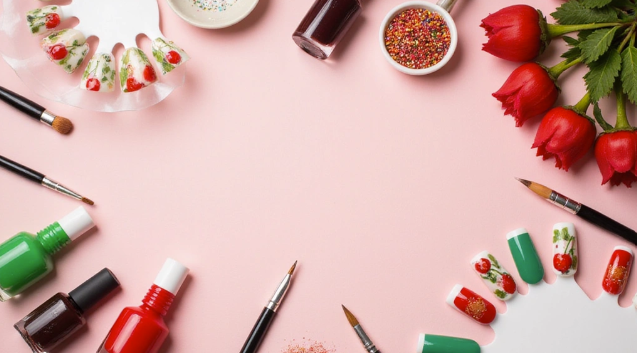
Are you ready to brighten your manicure game with delightful cherry nail art? This beginner-friendly tutorial will guide you through creating vibrant and playful cherry designs that are perfect for any occasion.
With easy-to-follow steps and a splash of creativity, you’ll learn how to transform your nails into a fruity masterpiece in no time. So grab your nail supplies, and let’s get started on this fun nail art journey!
Gather Your Supplies

Before you embark on your cherry nail art adventure, it’s crucial to collect all the necessary supplies to ensure a smooth and enjoyable experience. Start with a quality base coat to protect your natural nails, followed by vibrant cherry red and green nail polishes to bring your design to life.
To finish off your masterpiece, don’t forget a reliable top coat for that glossy shine and lasting durability. Additionally, having essential tools like dotting tools and nail brushes will help you achieve intricate details with ease.
For those looking to simplify the process, consider investing in a comprehensive nail art kit that includes all the basics, such as nail files and a quick-dry top coat. Having everything organized and within reach will keep your creativity flowing and enhance your nail art journey!
Product Recommendations:
• Base coat
• Cherry red nail polish
• Top coat
Prep Your Nails

Proper nail preparation is essential for achieving a stunning cherry nail art look. Begin by gently removing any old nail polish using a high-quality nail polish remover. Next, trim your nails to your desired length, ensuring they are neat and manageable.
Once you’ve shaped your nails, take the time to file them into your preferred style—be it oval, square, or almond. A smooth and clean nail surface will enhance the adherence of your cherry designs and promote their longevity. Don’t forget to apply a protective base coat, like a reliable base coat, which helps create an even canvas for your art while safeguarding your nails. With these steps, you’re well on your way to creating beautiful cherry nail art!
Product Recommendations:
• Nail polish remover
• Nail file set
• Base coat
Create the Cherry Base

To kick off your cherry nail art, begin by applying a vibrant cherry red base coat to your nails. This bold hue will create the perfect backdrop for your charming cherry designs.
For an even and opaque finish, be sure to apply two coats of your chosen polish, allowing each layer to dry completely before moving on to the next. If you’re looking to add a touch of sparkle, consider using a glittery red polish, such as this one, for a dazzling effect.
This initial base layer is essential, as it sets the stage for your delightful cherry details and ensures your nail art stands out beautifully!
Product Recommendations:
• glitter nail polish
Painting Cherry Designs

Now, it’s time to bring your cherry nail art to life! Using a fine nail art brush or a dotting tool, such as the nail art brush set, carefully paint small cherry shapes on your nails.
Begin with the cherry body using a slightly darker red polish, and for the leaves, choose a vibrant green. If you’re in need of a high-quality nail polish, consider using this cherry red shade to really make your art pop. Experiment with different sizes and placements to create a whimsical look that reflects your personal style.
Don’t worry if you make mistakes; a good nail polish remover will be your best friend for quick corrections. This step allows your creativity to shine, so have fun with it and explore the endless possibilities of cherry nail designs!
Product Recommendations:
• nail art brush set
• cherry red nail polish
• nail polish remover
Add Details with White Accents

To enhance your cherry nail art and make it truly stand out, consider incorporating white accents into your design. Using a fine brush, you can create delicate highlights on your cherries, adding depth and dimension. For an extra whimsical touch, apply tiny white dots throughout your design.
These subtle details can significantly elevate your nail art, giving it a polished and professional appearance. Additionally, adding a few white flowers around the cherries introduces a lovely floral element, beautifully contrasting with the vibrant red and green hues. Remember, in nail art, the details truly make all the difference! For your nail art needs, you can check out essential tools like the Fine Detail Brush Set for precision work and Nail Art Dotting Tool to create those charming dots effortlessly.
Product Recommendations:
• Nail Art Dotting Tool
• Nail Art Palette
Seal It with a Top Coat

Once you’re thrilled with your cherry nail designs, it’s essential to finish them off with a top coat. Applying a clear top coat not only provides a beautiful glossy finish but also protects your intricate artwork from chipping and wear.
Consider using a high-quality top coat like Terracotta Sweater, which is known for its durability and shine. Make sure to apply a generous layer, ensuring that you cover the edges of your nails thoroughly. This extra care will help your cherry nail art remain vibrant and intact for longer.
Finally, remember to allow your top coat to dry completely; your patience will definitely pay off in the end!
Product Recommendations:
• Gel top coat
• nail art brush set
• cherry nail decals
Maintain Your Nail Art

To ensure your stunning cherry nail art remains vibrant and lasts longer, regular maintenance is essential. Start by applying a nourishing cuticle oil daily to keep your nails and cuticles well-hydrated, which helps prevent dryness and chipping.
It’s also wise to steer clear of harsh chemicals that could strip your polish, so consider using protective gloves when tackling household chores. If you happen to spot any chips in your nail art, don’t hesitate to do a quick touch-up with your favorite cherry red polish and follow up with a fresh layer of top coat. Keeping your nails in excellent condition will ensure that your beautiful artwork continues to shine bright!
Product Recommendations:
• Protective gloves
• Top coat
Try Different Cherry Variations

Don’t hesitate to explore various cherry nail art designs to unleash your creativity! You can create stunning ombre cherry effects, mix in pastel colors for a softer aesthetic, or incorporate gold foil for a touch of elegance that really makes your nails pop.
For these techniques, consider using a high-quality nail art brush to achieve precision in your designs. Experimenting with marbling or stamping can produce unique results, so don’t shy away from trying out different methods. Cherry nail art is incredibly versatile, and with the right tools in hand, like a set of nail stamping plates, you’ll be able to truly customize each design to reflect your personal style. Let your imagination run wild and create nail art that is distinctly yours!
Product Recommendations:
• nail art brush set
• nail stamping plates
• gel nail polish kit
Incorporate Accessories

Accessories play a vital role in elevating your cherry nail art to an entirely new level of creativity and fun. By incorporating items such as nail jewels, stickers, or even a charming cherry-themed nail ring, you can add an exciting touch to your designs.
These embellishments not only complement your artistic creations but also introduce an additional layer of interest that captures attention. Be sure to choose accessories that align with your overall theme, and don’t hesitate to mix and match for a more personalized look. With the right accessories, your nail art can exude a playful and delightful vibe, making it truly one-of-a-kind!
Product Recommendations:
• nail jewels
• nail stickers
• cherry-themed nail ring
Engage with the Nail Art Community

Engaging with the nail art community can be a fantastic source of inspiration and support as you embark on your nail art journey. By joining social media groups and following talented nail art influencers, you can immerse yourself in a vibrant community that shares your passion. Participating in challenges not only helps you connect with fellow enthusiasts but also encourages you to try new techniques and styles.
Don’t forget to share your stunning cherry nail art creations with the world! Use the right tools to enhance your designs; for instance, consider using a high-quality Terracotta Sweater for a chic look that complements your nail art.
Learning from others and showcasing your own work can significantly boost your skills and keep your enthusiasm for nail art alive. Inspire others with your creativity and see how your contributions can enrich the community!
Product Recommendations:
• Nail art brush set
• UV gel nail polish kit
• nail art dotting tools
Document Your Nail Art Journey

Consider capturing your nail art journey as you create stunning cherry designs. Keeping a nail art journal or even starting an Instagram account dedicated to your creations can be a fantastic way to track your progress and inspire others along the way.
Make sure to take before-and-after photos of your nail designs to showcase your skills. You can also jot down the techniques that yielded the best results, and don’t forget to share your favorite products, like the Terracotta Sweater for that perfect cozy vibe while you work.
This documentation process not only allows for personal reflection on your growth but also provides a wonderful opportunity to connect with fellow nail art enthusiasts who share your passion!
Product Recommendations:
• Nail art brush set
• UV LED nail lamp
• cherry nail art stickers
Celebrate Your Achievements

Take a moment to revel in your nail art accomplishments! Whether you’ve successfully mastered intricate cherry designs or ventured into new techniques, recognizing your growth is essential.
Consider sharing your stunning cherry nail art creations with friends or on social media to motivate and inspire others in the community. To reward your hard work and creativity, why not treat yourself to a new nail art kit? You can find fantastic options like the Terracotta Sweater for a cozy, artistic vibe, or perhaps indulge in a pampering session at your favorite salon.
Celebrate every milestone in your nail art journey, and remember, each achievement deserves recognition!
Product Recommendations:
• Nail Art Brush Set
• Nail Art Dotting Tools
• Acrylic Nail Art Kit
Stay Updated on Nail Trends

The nail art landscape is constantly evolving, with fresh trends surfacing all the time. To keep your cherry nail art designs at the forefront, make sure to follow popular nail art blogs, influencers, and magazines that highlight the latest styles and techniques.
Consider participating in workshops or online courses to further enhance your skills and ensure your nail art remains vibrant and innovative. You might also want to explore various tools and products that can elevate your creations, such as the Terracotta Sweater for a unique color palette or specialized nail polishes that add depth to your designs.
Embrace new trends enthusiastically, and don’t hesitate to integrate them into your cherry nail art masterpieces!
Product Recommendations:
• Nail art brush set
• UV gel nail polish kit
Final Touches and Care

After you’ve perfected your cherry nail art, it’s crucial to take a few moments for those all-important final touches. Carefully examine your designs for any minor flaws and make any necessary adjustments to ensure they look pristine.
In addition to perfecting your artwork, maintaining the health of your nails is vital. Regularly applying cuticle oil can make a significant difference in keeping your nails and cuticles hydrated. Avoid the excessive use of harsh chemicals, as they can damage both your nails and your beautiful cherry designs.
By prioritizing nail care, you’ll not only keep your captivating cherry art looking fabulous but also encourage healthy nail growth for the future!
Product Recommendations:
• Cuticle oil
• nail art brush set
• nail polish remover.
Your Cherry Nail Art Adventure Awaits!

Now that you have all the steps and tips for creating stunning cherry nail art, it’s time to unleash your creativity!
Remember that practice makes perfect, and don’t hesitate to experiment with your designs. Share your creations with the world and connect with fellow nail art enthusiasts. Enjoy your nail art journey, and may your cherry nails bring joy and style to your everyday look!
Note: We aim to provide accurate product links, but some may occasionally expire or become unavailable. If this happens, please search directly on Amazon for the product or a suitable alternative.
This post contains Amazon affiliate links, meaning I may earn a small commission if you purchase through my links, at no extra cost to you.
Amazon and the Amazon logo are trademarks of Amazon.com, Inc, or its affiliates.
Author
judieannrose@live.co.uk
Related posts

15 Hair Care Tips That Will Transform Your Tresses Overnight (You Won’t Believe #7!)
Get ready to wake up with healthy, shiny hair that turns heads! Let’s dive into these incredible tips that will change your...
Read out all
The Ultimate Guide to Eyeliner Styles: From Classic to Cat Eye
In this guide, we’ll explore the enchanting world of eyeliner styles, from the classic elegance of the timeless line to the bold...
Read out all
15 Easy Floral Nail Art Tutorials You Can Do at Home (You’ll Be a Pro in No Time!)
Whether you're aiming to add a touch of spring to your fingertips or simply want to express your creativity, these 15 easy...
Read out all
How to Curl Your Hair in Under 10 Minutes: Quick and Easy Hairstyles for Busy Days
Curling your hair doesn’t have to take forever! In this article, we’ll show you how to achieve beautiful curls in under 10...
Read out all
6 Best Makeup Removers That Are Gentle Yet Effective (Say Goodbye to Stubborn Makeup!)
Whether you wear a full face of glam or just a touch of mascara, it's essential to cleanse your skin gently yet...
Read out all
17 Adorable Easter Nail Designs That Are Perfect for Spring Celebrations!
This year, let's add a touch of creativity to our style with some adorable Easter nail designs that perfectly capture the essence...
Read out all