
As an Amazon Associate I earn from qualifying purchases.
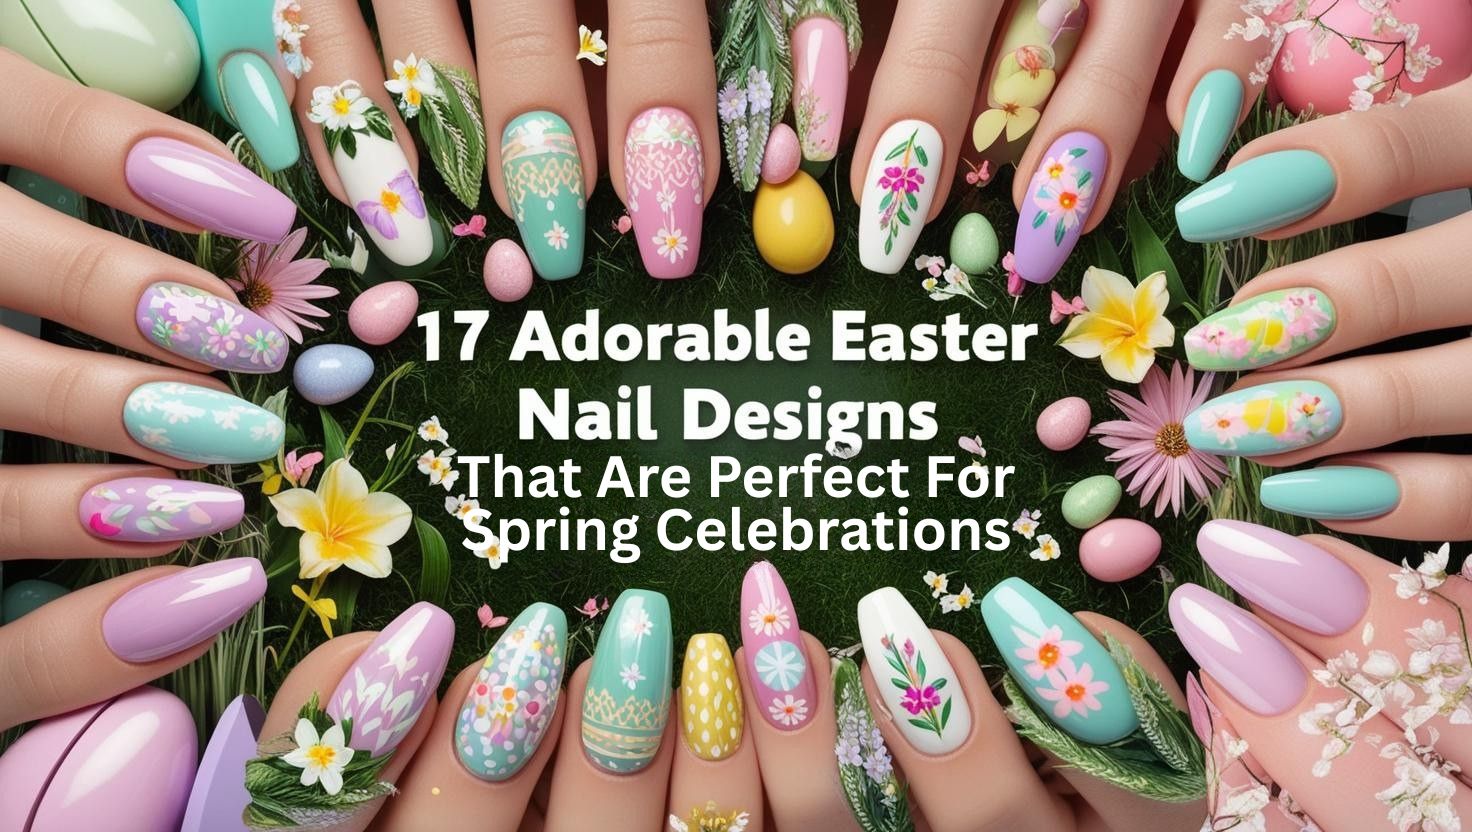
On the JJ Barnes Blog, these adorable Easter nails designs are perfect for Spring celebrations.

Spring is here, and so is the season of blooming flowers, sunny days, and festive celebrations like Easter.
This year, let’s add a touch of creativity to our style with some adorable Easter nail designs that perfectly capture the essence of spring. From pastel colors to cute bunny motifs, these nail designs are not just trendy, but they also embody the joy and renewal that comes with the season. Whether you want to flaunt your nails at an Easter brunch or simply want to feel festive, these designs will inspire you to get creative with your spring nails. Join us as we explore 17 delightful Easter nail designs that will have everyone asking, ‘Where did you get those nails?’
1. Pastel Bunny Bliss

Embrace the gentle hues of spring with delightful pastel bunny nail art that exudes charm and warmth. Utilizing shades such as baby pink, sky blue, and soft lavender, these nails are a perfect fit for the Easter holiday. Start by painting your nails in a solid pastel color, and then embellish one or two accent nails with tiny bunny designs. Complete the look with adorable little white tails and cute bunny faces for an extra touch of cuteness!
To achieve a precise bunny design, consider using Bunny Nail Art Brushes. A glossy finish can be achieved by topping off your design with a Clear Top Coat, ensuring your nails look smooth and polished. If you’re feeling a bit adventurous, mix two pastel shades on different nails for a playful twist.
For an added festive touch, think about incorporating tiny flower decals alongside the bunnies. To get started, grab a Pastel Nail Polish Set and some Nail Art Dotting Tools to create your masterpiece!
Product Recommendations:
• Bunny Nail Art Brushes
• Clear Top Coat
• Pastel Nail Polish Set
2. Floral Fantasy

Transform your nails into a blooming masterpiece with delightful floral designs that capture the essence of spring!
Opt for vibrant hues such as sunny yellows, lively pinks, and fresh greens to craft enchanting flower patterns on your fingertips. Whether you prefer a single delicate flower on each nail or a lush garden scene with multiple blossoms, the choice is yours. For a trendy finish, consider applying a matte top coat, which adds an elegant touch to your floral art.
To make the process easier, don’t forget to check out a Dotting Tools Set for effortlessly creating flower centers and petals. You can also elevate your design by incorporating a set of Floral Nail Art Stickers for quick and stunning results.
Mix and match colors for a vibrant floral bouquet, and consider adding accent nails with a glittery finish to create a sparkling contrast. Remember, floral designs are timeless and versatile, making them a fantastic choice to wear beyond the Easter season. For an even simpler application, feel free to experiment with water decals to achieve a flawless look!
Product Recommendations:
• Dotting Tools Set
• Floral Nail Art Stickers
• Water Decals for Nail Art
3. Egg-cellent Ombre

Ombre nails offer a stylish way to embrace the Easter spirit while keeping your look sophisticated. By blending pastel shades like light pink and lavender, you can create a smooth gradient reminiscent of beautifully dyed Easter eggs. For an extra touch of glamour, consider adding a hint of shimmer at the tips. This design strikes the perfect balance for those who prefer a subtle yet chic nail aesthetic.
To achieve a flawless ombre effect, use makeup sponges specifically designed for nail art. Finish off your look with a high-gloss top coat to enhance the vibrancy of the colors. Additionally, you can elevate your design by painting a simple bunny or egg motif on a couple of accent nails, bringing a playful touch to your overall manicure.
The beauty of ombre nails lies in their versatility; they can be customized with any color combination, making them suitable for any celebration. For a modern twist on this classic style, consider incorporating metallic shades into your ombre gradient. Don’t forget to utilize a nail art brush for those intricate details! Lastly, if you’re looking to explore more color options, check out an ombre nail polish set that provides a perfect palette for your spring celebrations.
Product Recommendations:
• high-gloss top coat
• ombre nail polish set
4. Cute Chick Nail Art

Celebrate Easter in style with charming little chicks adorning your nails!
Start by applying a bright yellow polish as the base for your chick design. Once your base is dry, you can bring your chicks to life by painting tiny faces and feet on your nails. For added flair, consider using Chick Nail Art Stickers to simplify the process. Don’t forget to enhance the festive vibe with fun accessories like tiny bows or little eggs beside the chicks. This playful design is perfect for anyone who loves whimsical nail art.
For intricate details like eyes and beaks, a set of Fine Detail Brushes will be your best friend. To give your chicks an extra touch of charm, think about applying some Glitter Nail Polish, which adds a delightful sparkle. Pair your chicks with a pastel-colored background for a complete spring look that radiates joy and celebration.
Remember, chick designs not only look adorable but also symbolize new beginnings, perfectly aligning with the themes of Easter. You can further enrich your nail art by incorporating elements like grass or flowers to create a delightful spring scene.
Product Recommendations:
• Chick Nail Art Stickers
• Glitter Nail Polish
5. Easter Egg Patterns

Nothing embodies the spirit of Easter quite like beautifully decorated eggs, and now you can celebrate this joy right on your nails!
Start with a lovely base color, such as white or a soft light blue, and then unleash your creativity by adding colorful patterns that mimic traditional Easter egg designs. Think vibrant stripes, playful polka dots, and delicate floral prints. You can make each nail a unique masterpiece with a different design, resulting in an eclectic and fun look.
For achieving those clean lines when creating stripes, be sure to utilize dotting tools which can also help with intricate details. A colorful nail polish set will provide you with a variety of shades to make each egg design truly stand out; check out this Colorful Nail Polish Set for inspiration.
Finish off your design with a glossy top coat to make those patterns shine, or opt for a matte finish for a trendy contrast that will catch everyone’s eye. This design offers endless possibilities for creativity, allowing you to mix and match patterns and colors to your heart’s content!
Product Recommendations:
• glossy top coat
6. Glittery Spring Vibes

Elevate your Easter celebrations with some stunning glittery nail designs that truly shine!
Start with a light base color and then layer on your favorite glitter polish for a breathtaking sparkle. You can choose to adorn all your nails with glitter or opt for a few accent nails to really make them pop. For that extra wow factor, consider adding some rhinestones for nail art to your glittery nails—these gems will take your manicure to the next level.
To ensure a flawless finish, apply glitter polish over a wet base coat for an even application and seal it all in with a quality top coat to smooth out the glitter’s texture and give your nails a polished look. Don’t forget to experiment by mixing different sizes of glitter for a unique and eye-catching effect.
Glittery nails are especially perfect for evening Easter events or festive parties, allowing you to customize the color of the glitter to match your outfit or other nail designs. If you’re looking to refine your technique, consider using nail art brushes for precise application and detailing. Let your creativity shine this spring!
Product Recommendations:
• glitter nail polish set
7. Whimsical Watercolor

Unleash your creativity with enchanting watercolor techniques to craft a dreamy nail design that’s perfect for Easter celebrations.
By utilizing a range of pastel colors, you can create soft, blended effects reminiscent of beautiful watercolor paintings. This design is ideal for art lovers who seek something truly unique for their nails. To elevate the look, consider adding delicate floral or egg motifs that celebrate the season.
For the best results, use a Small Brush Set or a sponge to achieve that stunning watercolor effect. Don’t hesitate to experiment with various color combinations to discover your perfect palette with Pastel Nail Polish. Finally, seal your masterpiece with a top coat to protect the design and enhance the vibrancy of the colors.
Watercolor nails are a fashionable choice that can be adapted for any season or occasion, allowing for a high degree of personal expression—each creation is as unique as the artist behind it!
Product Recommendations:
• Small Brush Set
• Pastel Nail Polish
8. Sweet Peep Designs

Celebrate Easter in style with delightful peep bunny nail art that adds a whimsical touch to your spring celebrations! Start by painting your nails in a variety of pastel colors using a Pastel Nail Polish Set. Then, create adorable peep bunny designs on select nails. These charming, marshmallow-inspired bunnies are sure to evoke nostalgia and bring a smile to everyone who sees them.
To enhance your design, consider adding mini eggs or flowers around the bunnies for a fully festive look. For precise detailing on the peep faces, make use of Fine Detail Brushes. You can also experiment with different pastel shades for the bunnies to make them uniquely yours. For a fresh twist, finish your look with a Matte Top Coat that gives your nails a chic finish.
If you want to simplify the process, consider using Easter Nail Art Stickers to easily achieve that festive look. With these tips and products, you’ll create a delightful ‘Easter basket’ effect that captures the spirit of the holiday!
Product Recommendations:
• Pastel Nail Polish Set
• Fine Detail Brushes
9. Bunny Ears Accent Nails

Elevate your Easter nail game with charming bunny ears accent designs that add a playful twist to your manicure!
Start by painting your nails in a solid pastel color using pastel nail polish, then bring your creativity to life by crafting adorable bunny ears on one or two accent nails. For an even cuter effect, consider adding little faces or bows to the bunnies. This delightful design is not only perfect for Easter celebrations but can be enjoyed throughout the spring season!
For those intricate details, a nail art brush set is essential to ensure your bunny ears look precise and adorable. To enhance your look, stick to a cohesive color theme and think about incorporating glitter nail polish into the bunny ears for that extra sparkle.
Additionally, if you want an even quicker option, you can use bunny nail art stickers to achieve a similar whimsical effect with ease. Pair these designs with other simple patterns for a beautifully balanced and festive look!
Product Recommendations:
• pastel nail polish
• bunny nail art stickers
10. Springtime Stripes

Stripes are a timeless design that always remains stylish, especially during the spring season!
For your Easter nail art, why not experiment with vibrant pastel colors using a Pastel Nail Polish Set? You can create an eye-catching striped design by mixing horizontal and vertical stripes for a cheerful look, or opt for diagonal stripes to add a touch of flair. Alternating colors can bring a playful vibe to your nails.
To achieve those clean lines when painting your stripes, using nail tape is highly recommended. For an interesting pattern, try combining thin and thick stripes. Don’t forget to apply a glossy top coat to enhance the shine and finish of your design.
Additionally, consider using a striping brush set for more detailed work. Striped designs are easily customizable for any occasion and pair beautifully with simple accent nails, resulting in a well-balanced look.
Product Recommendations:
• Pastel Nail Polish Set
• Nail Tape
• Striping Brush Set
11. Easter Egg Hunt

Incorporate the delightful spirit of an Easter egg hunt into your nail art for a festive look!
Start with a light base color and then get creative by painting tiny, colorful eggs artfully scattered across your nails. Opt for bright shades to ensure the eggs pop, and don’t forget to add fun details like stripes and polka dots. This design is perfect for those who want to embrace the playful and cheerful essence of Easter.
To achieve this look, consider using a Colorful Nail Polish Set for vibrant hues. A fine brush is essential for detailing your egg designs, allowing you to craft intricate patterns. For a unique twist, finish with a Matte Top Coat to give your nails a stylish matte finish instead of the usual glossy look.
To amp up the fun, consider incorporating an accent nail featuring a bunny or a basket. You can also use Nail Art Stickers for added convenience and creativity. This design not only celebrates the beloved Easter tradition of egg hunts but also allows you to customize the colors and patterns to reflect your unique personality.
Product Recommendations:
• Colorful Nail Polish Set
• Matte Top Coat
• Nail Art Stickers
12. Sweet Spring Animals

Celebrate the joy of spring with delightful nail designs featuring adorable spring animals! From playful bunnies to cheerful chicks, you can create charming animal faces on your nails using vibrant pastel colors. For the perfect palette, consider using a Pastel Nail Polish Set that will bring your designs to life.
You can opt for a cohesive spring-themed nail set showcasing various animals or choose to focus on a single character for a simpler, yet equally cute, look. This design is ideal for animal lovers of all ages who want to embrace the festive spirit of Easter in a playful way.
To achieve intricate details, don’t forget to use Fine Detail Brushes for painting those tiny features. Once your artistic work is complete, apply a Glossy Top Coat for a sleek, polished finish.
These charming animal designs are not only a wonderful way to express your love for spring but also serve as a versatile choice, perfect for both kids and adults alike!
Product Recommendations:
• Pastel Nail Polish Set
• Fine Detail Brushes
• Glossy Top Coat
13. Sparkling Eggshells

Elevate your Easter nail art with stunning sparkling eggshell designs that are sure to impress!
Begin by applying a base color of your choice, then use a thin brush to create the cracked eggshell effect with a contrasting hue. To add a touch of glamour, incorporate some sparkle by placing glitter nail polish around the edges of your designs. For an extra layer of bling, consider embellishing your nails with rhinestones, which will beautifully catch the light and enhance the festive feel.
Finish off your masterpiece with a glossy coat, like this glossy top coat, to amplify the sparkle and give your nails a polished look.
This unique cracked eggshell design is a delightful twist on traditional Easter themes, and by incorporating these sparkling elements, you’ll create a stunning nail art that’s perfect for all your spring celebrations!
Product Recommendations:
• glitter nail polish
• rhinestones
• glossy top coat
14. Bright and Bold Color Blocks

Make a statement this Easter with vibrant and bold color block designs that are sure to turn heads!
Utilize eye-catching hues like hot pink, electric blue, and sunny yellow to create striking blocks on your nails. This modern nail art style is perfect for those who wish to stand out during spring celebrations. Don’t hesitate to experiment with different shapes and placements for a truly unique look.
To achieve clean edges when creating your blocks, consider using nail tape. Mixing and matching colors can help you discover your ideal combination, so don’t be afraid to get creative with your choices. Finally, seal your design with a glossy top coat to enhance the vibrant shades and give your nails a stunning finish.
Color block designs are not only trendy but also versatile, allowing you to adapt them for any season. This technique provides an excellent opportunity for personal expression through your color selections, making it a fun addition to your spring celebrations. For the best results, you might also want to invest in some nail art brushes to refine your application skills.
Product Recommendations:
• nail tape
• glossy top coat
• nail art brushes
15. Playful Polka Dots

Polka dots are a delightful and playful way to infuse some fun into your Easter nail art!
Start by selecting a light base color and then create cheerful polka dots using contrasting shades from a Colorful Nail Polish Set. You can alternate dot sizes for a whimsical effect or design unique patterns on each nail for added charm. This design is ideal for anyone looking to keep their nails lighthearted and vibrant.
For a polished finish, don’t forget to apply a Glossy Top Coat that will give your nails a beautiful shine. To achieve perfect and even dots, using Nail Art Brushes can make all the difference.
Remember, polka dots are versatile and can be tailored to suit any occasion beyond just Easter. Feel free to customize the colors to match your outfit or reflect your mood!
Product Recommendations:
• Colorful Nail Polish Set
• Glossy Top Coat
16. Egg-cellent Glitter Gradient

Elevate your Easter nail game with the charming “Egg-cellent Glitter Gradient,” a design that beautifully combines the sparkle of glitter with the soft hues of a gradient!
Begin by applying a light base color to your nails, then use a makeup sponge to effortlessly blend in glitter at the tips for a stunning gradient effect. This eye-catching design mimics the look of intricately decorated Easter eggs, making it an ideal choice for your holiday celebrations. For an extra touch of whimsy, consider adding small egg or bunny designs to your nails.
To ensure your masterpiece lasts, finish off with a quality top coat that seals in your design and adds a glossy finish.
Unique insights into this design include its versatility, as glitter gradients can be tailored to match any color palette you desire. Whether you’re attending a casual brunch or a formal gathering, this delightful nail art is sure to impress! Enhance your creativity with precise detailing using nail art brushes for those intricate designs.
Product Recommendations:
• makeup sponge
• top coat
• nail art brushes
17. Bright Bunny Faces

Finish off your Easter nail art with the delightful addition of bright bunny faces, a fun way to celebrate the holiday in style!
Start by selecting a vibrant base color for your nails and then use a fine brush for detailing the bunny faces—check out these Fine Detail Brushes to achieve those precise features.
To enhance your design, consider adding whimsical accessories like little bows or colorful eggs, making your nails even more festive. Don’t forget to apply a Glossy Top Coat for a shiny finish that will really make your designs pop!
For an easier approach, you can also explore Bunny Nail Art Stickers that provide a quick and adorable way to achieve this look without the need for advanced painting skills. This bunny face design is perfect for both kids and adults, making it a versatile choice for everyone to enjoy during the Easter festivities!
Product Recommendations:
• Glossy Top Coat
• Bunny Nail Art Stickers
Conclusion

With these 17 adorable Easter nail designs, you’re sure to bring some festive spirit to your spring celebrations.
From playful bunnies to sparkling gradients, there’s a perfect design for everyone to enjoy. Don’t be afraid to mix and match styles, colors, and designs to create your unique look! Share your favorite designs with friends and family, and let the Easter fun begin!
Note: We aim to provide accurate product links, but some may occasionally expire or become unavailable. If this happens, please search directly on Amazon for the product or a suitable alternative.
This post contains Amazon affiliate links, meaning I may earn a small commission if you purchase through my links, at no extra cost to you.
Amazon and the Amazon logo are trademarks of Amazon.com, Inc, or its affiliates.
Author
judieannrose@live.co.uk
Related posts

How to Curl Your Hair in Under 10 Minutes: Quick and Easy Hairstyles for Busy Days
Curling your hair doesn’t have to take forever! In this article, we’ll show you how to achieve beautiful curls in under 10...
Read out all
6 Best Makeup Removers That Are Gentle Yet Effective (Say Goodbye to Stubborn Makeup!)
Whether you wear a full face of glam or just a touch of mascara, it's essential to cleanse your skin gently yet...
Read out all
21 Stunning Long Hair Hairstyles That Are So Easy, You’ll Want to Try Them All!
From elegant updos to playful braids and chic ponytails, there’s a hairstyle for every occasion. In this list, we’ll showcase 21 stunning...
Read out all
12 Stunning Braided Hairstyles You Can Do in Under 10 Minutes (You’ll Love #5!)
Braided hairstyles are not only stylish but also practical, keeping your hair neat and out of your face. In this listicle, we’ll...
Read out all
19 Creative Nail Art Ideas That Will Blow Your Mind (Prepare to Be Inspired by #6!)
Whether you're preparing for a special occasion or just want to add a little flair to your everyday look, these 19 creative...
Read out all
How Many Steps Should You Walk To Boost Fitness And Feel Amazing?
Wondering how many steps it takes to feel healthier, stronger, and full of energy? Walking is one of the easiest, most joyful...
Read out all